This article covers how to post photographs and other images on your East Kingdom Wiki page. If you need to make a page, please refer to EKWiki Part 1: Why a Wiki? If you have photos and images uploaded and linked, you can go to EKwiki Part 3: Adding Personal Information.
This post explains:
1. How to upload a photo of yourself.
2. How to upload other images.
3. How to edit your EKwiki page to show these images.

The best thing you can do with your EKwiki page is to post a photo of yourself in garb. This will help both the people who are nominating you for an award, and the people who review the nomination.
To upload a picture, use the “upload file” button on the sidebar of the EKwiki page, or go directly to https://wiki.eastkingdom.org/index.php?title=Special:Upload
In the Upload page, select a file to load from your computer or phone onto the EKwiki. Click “Choose File” button to begin.

If you have a photo, you can choose it, and that photo will be uploaded (make it a part of the EKwiki until it is actively removed). This screenshot shows where the Downloads folder is in Windows:
 If you do not have a photo ready, download one (move it down from the internet and put it on to your device). On a computer, you can right click on a photo on FaceBook or another site, and choose the option “Save Image As”. This saves the picture to your Downloads folder, or whatever location you have set as the default. If you are working from a phone, the photos you take may be in a folder called Photos. After you have downloaded your photo, note its file name. In the example, that is “IMG_20171027-163334”
You should upload an image that includes your SCA name, so it is easy to find. You should not upload your image with the file name “Photo needed.jpg” or “Device needed.jpg” This will alter every filler image in the wiki, causing confusion.
FaceBook is an excellent place to ask for help if you have a hard time uploading photos. One thing that makes wikis easy to use is that anyone can upload photos and images to any page.
After the photo is uploaded, you can upload an image of your heraldry. Herald’s point provides submitters with a paper copy of their devices. If you have misplaced the paperwork, it is displayed on the Oscar database and your local herald should be able to send you the image file or upload it to the EKwiki. (If your local herald isn’t familiar with Oscar, you can ask for help from the baby heralds FaceBook group.)
After the images are uploaded to the wiki, link your page to the images. Click on the “edit” tab at the top of the page. This function allows you to edit the entire EKwiki page, including the images on the side bar that display your photo and heraldry.


If you only need to add a little information, such as describing your persona, you can click on the [edit] in brackets beside that topic.
Clicking the “edit” tab at the top of the page displays a text box, shown on the left.
Replace “Photo needed” with your file name, in this example “”IMG_20171027-163334”. Note that you will need to replace only the characters in “Photo needed” – if you replace even as much as the colon (:) after the word “Image” the EKwiki page will not load properly.
Do not upload an image with the file name “Photo needed.jpg” or “Device needed.jpg” This will alter every filler image in the wiki, causing confusion. Include your name in the file name.
If you use the Preview or Save Changes option and your photo takes up most of the page, you have an error in your code. Make sure you have listed “200px” “thumb” and “left” in your code, like this:
|photo = [[Image:IMG_20171027-163334.jpg|200px|thumb|left]]

If you have received awards or are working as an officer for your local barony or shire, you should include that information on your page. For complete list of these codes, go to the Awards & Templates List.
The awards and officer positions are encased in two sets of curly brackets {{ }} . These brackets act as a type of code for the EKwiki. Just like HTML bracket issues, if your EKwiki page looks visibly wrong, it is likely caused by a missing bracket.
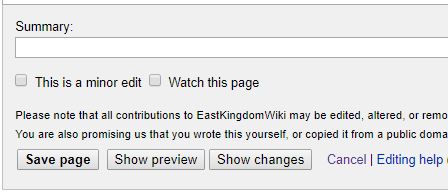
After you have entered any Awards or Offices, click Save Page at the bottom. When your page displays, you can verify that the images are correct.
To add personal information in the body of your EKwiki, please visit EKwiki Part 3: Adding Personal Information.
Thank you for reading my post on what to put on your East Kingdom Wiki page. If you need to make a page, or are wondering why having an EKwiki page is useful, please refer to my post EKWiki Part 1: Why a Wiki?

2 thoughts on “EKwiki Part 2: Adding Photos and Images”