EKwiki Part 3: Adding Personal Information

This article covers what information can be posted on your East Kingdom Wiki page.

If you need to make a page, please refer to EKWiki Part 1: Why a Wiki?
If you need to add images to your page, please refer to EKwiki Part 2: Adding Photos and Images

This post covers:
1. An overview of what to add to your EKwiki.
2. How to add your personal information to the wiki.
3. An explanation of the wiki formatting tools.

The final part of your EKwiki page is adding your persona information. In some ways, this is the hardest part of creating your EKwiki. I can write technical instructions all day, but choosing what to share with the entire society is less cut-and-dried.

Describing your persona is helpful for people who want to get to know you better. If you haven’t created a persona, you can list your favorite activities. If an artist is drawing a scroll for you, they can personalize the artwork. Even just listing your favorite colors is good.

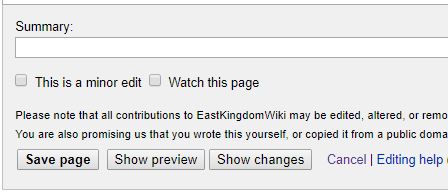
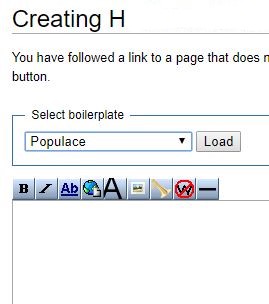
There are Categories listed in the “edit” tab at the top of the page, which are noted with pairs of equals signs:  ==  == . You can create or delete any category you wish. If you’re a newcomer and haven’t worked as an officer or created any publications, you can simply delete those lines of text. I removed the ‘officer’ section from my EKwiki and replaced it with a section on my heraldry.

To link to another page in the EKwiki, you put that page name inside two sets of brackets. My consort’s page links to mine with the code Create19.JPG“In Case of Court, please contact [[Thory Vedardottir]].” The link displayed on his wiki is this.

If you want to link to a different website from the EKwiki, put both the website text (called a URL) and a description of the website in a set of brackets. Be sure to leave a space between the URL and the first word of the description, or the description will look odd and the website will not load. This is what the typed text linking to my local group looks like:

Create17FIX

To make a bulleted list, simply make each item on the list begin with an asterisk (*). This text is on the left and the result is on the right:
Create18*Please do not surprise due to anxiety.
*Please summon to RP event in advance or use a writ.

Finally, there is the category called, In Case of Court. It is a new addition to the EKwiki created by Duke Brennan, and is very helpful. The problem with awards is that award presentation has several aspects.

Awards are bestowed upon people who volunteer for the society, and as such receiving an award is often a surprise. (Awards are not like elementary school trophies, and are not handed out for merely participating. Awards are intended to be given to people who are helping for the sake of helping, not merely chasing prizes.)

Surprise awards can be tricky because the people who recommend someone for an award may not know how to ensure that person will be at an event to receive it. By listing a friend, mentor, or partner in your In Case of Court, it is much easier to receive an award. The double brackets [[ ]] let you link to their page.

For people who do not like surprises, or have anxiety when they are called before a crowd, they can simply write, “Please do not surprise due to anxiety”

Thank you for reading my  post on what to put on your East Kingdom Wiki page. If you need to make a page, or are wondering why having an EKwiki page is useful, please refer to  EKWiki Part 1: Why a Wiki?

If you need to add images to your page, please refer to EKwiki Part 2: Adding Photos and Images

EKwiki Part 2: Adding Photos and Images

This article covers how to post photographs and other images on your East Kingdom Wiki page. If you need to make a page, please refer to EKWiki Part 1: Why a Wiki? If you have photos and images uploaded and linked, you can go to EKwiki Part 3: Adding Personal Information.

This post explains:
1. How to upload a photo of yourself.
2. How to upload other images.
3. How to edit your EKwiki page to show these images.
Create5

The best thing you can do with your EKwiki page is to post a photo of yourself in garb. This will help both the people who are nominating you for an award, and the people who review the nomination.

To upload a picture, use the “upload file” button on the sidebar of the EKwiki page, or go directly to https://wiki.eastkingdom.org/index.php?title=Special:Upload

In the Upload page, select a file to load from your computer or phone onto the EKwiki. Click “Choose File” button to begin.

Create6

If you have a photo, you can choose it, and that photo will be uploaded (make it a part of the EKwiki until it is actively removed). This screenshot shows where the Downloads folder is in Windows:

Create7If you do not have a photo ready,  download one (move it down from the internet and put it on to your device). On a computer, you can right click on a photo on FaceBook or another site, and choose the option “Save Image As”. This saves the picture to your Downloads folder, or whatever location you have set as the default. If you are working from a phone, the photos you take may be in a folder called Photos. After you have downloaded your photo, note its file name. In the example, that is “IMG_20171027-163334”

You should upload an image that includes your SCA name, so it is easy to find. You should not upload your image with the file name “Photo needed.jpg” or “Device needed.jpg” This will alter every filler image in the wiki, causing confusion.

FaceBook is an excellent place to ask for help if you have a hard time uploading photos. One thing that makes wikis easy to use is that anyone can upload photos and images to any page.

After the photo is uploaded, you can upload an image of your heraldry. Herald’s point provides submitters with a paper copy of their devices. If you have misplaced the paperwork, it is displayed on the Oscar database and your local herald should be able to send you the image file or upload it to the EKwiki. (If your local herald isn’t familiar with Oscar, you can ask for help from the baby heralds FaceBook group.)

After the images are uploaded to the wiki, link your page to the images. Click on the “edit” tab at the top of the page. This function allows you to edit the entire EKwiki page, including the images on the side bar that display your photo and heraldry.

Create9

Create11.JPG

If you only need to add a little information, such as describing your persona, you can click on the [edit] in brackets beside that topic.Create10

Clicking the “edit” tab at the top of the page displays a text box, shown on the left.

Replace “Photo needed” with your file name, in this example “”IMG_20171027-163334”. Note that you will need to replace only the characters in “Photo needed” – if you replace even as much as the colon (:) after the word “Image” the EKwiki page will not load properly.

Do not upload an image with the file name “Photo needed.jpg” or “Device needed.jpg” This will alter every filler image in the wiki, causing confusion. Include your name in the file name.

If you use the Preview or Save Changes option and your photo takes up most of the page, you have an error in your code. Make sure you have listed “200px” “thumb” and “left” in your code, like this:
|photo = [[Image:IMG_20171027-163334.jpg|200px‎|thumb|left]]

Create14

If you have received awards or are working as an officer for your local barony or shire, you should include that information on your page. For complete list of these codes, go to the Awards & Templates List.

The awards and officer positions are encased in two sets of curly brackets {{ }} . These brackets act as a type of code for the EKwiki. Just like HTML bracket issues, if your EKwiki page looks visibly wrong, it is likely caused by a missing bracket.


Summary


After you have entered any Awards or Offices, click Save Page at the bottom. When your page displays, you can verify that the images are correct.

To add personal information in the body of your EKwiki,  please visit  EKwiki Part 3: Adding Personal Information.

Thank you for reading my  post on what to put on your East Kingdom Wiki page. If you need to make a page, or are wondering why having an EKwiki page is useful, please refer to my post EKWiki Part 1: Why a Wiki? 

EKWiki Part 1: Why a Wiki?

This article covers what information can be posted on your East Kingdom Wiki page, and how to make your own page. If you need to upload and display photos and images, you can go to  EKwiki Part 2: Adding Photos and Images. If you are ready to add your information, please visit EKwiki Part 3: Adding Personal Information.

This post explains:
1. How to request an EKwiki account.
2. How to create an EKwiki page with your name.
3. How to add a boilerplate template to your EKwiki page.

The East Kingdom Wiki is a useful tool. It is a site dedicated to the populace of the East Kingdom–every member of the Society for Creative Anachronisms on the east coast from New Jersey all the way to Newfoundland.  The EKwiki is a place to tell your story, share your photo, display your heraldry, and list any awards you have received. As a non-profit organization, the society runs on volunteer power. We grant awards to acknowledge the time and energy members put in, since we can’t award bonuses or raises.

I can wax poetic about the EKwiki, though it is mostly used as a reference page for awards, and for the people who will write and illustrate award scrolls. Any person can nominate anyone for an award, and one of the submissions questions asks for a photo of the person you are nominating for an award. The east kingdom maintains award database called the Order of Precedence, but it is far easier to look up someone on the EKwiki.

You will need several things before you create your own EKwiki page. First, you will need to request an account. Accounts are usually approved in a day or so, and while they request your legal name, the site will never display it. The society uses only persona name on the internet and at events.

After you have an account, you can create a Wiki page under your persona name. (If you don’t have a name yet, I have a post that explains the naming process called  What’s in a (Heraldic) Name?) If your name changes between when you create your wiki and when your name is registered with the college of heralds, you can ask an administrator to change the wiki.

NewPage

The other things you will need are a photo of yourself in garb, and an image of your heraldry. (If you don’t have heraldry, I have a post about Choosing Your Heraldry.) Finally, I encourage both heavy list fighters and fencers to take a photo of yourself in your kit, holding your helm. This is useful because you might not recognize someone’s face from the other end of the kingdom, but you will remember that viking knight with the two longswords who hit you seven times before landing a killing blow.

To create a new page, log in to the EKwiki and then type your full persona name into the Search box on the left side of the screen, and click “Go”. This is a screen capture of the box.

The example below shows a Search for a page called “H”. To make an EKwiki page H, you would click on the red “H” in the Search Results. To make your page on the wiki, you will need to type your SCA first and last name into the box and click “Search.”

Using a from of your name in Roman characters is best, because searching non-ASCII characters is problematic. (My registered name is Þórý Veðardóttir, but my wiki page is Thory Vedardottir.)

NewPage2
Create1

At this step, you choose which sort of page wiki page you want. This article focuses on creating an EKwiki page for your persona, which falls into the “Populace” category. Other types of pages are households and guilds.

Selecting a boilerplate is another way to say you are choosing the “Populace” template to be the base of your EKwiki page. Click the “Load” button  to load this template and wait for the information to fill into the text box.

Create2

Once you have clicked “Load,” the wiki text box will populate with code. This code is specific to wiki spaces and doesn’t work exactly like HTML.

(You don’t need to know HTML or other programming skills to make an EKwiki page. If you’d like to learn the basics and understand how tags work, I have a post explaining Basic HTML Commands.)

After the boilerplate text appears in the text box, save this template by clicking the “Save page” button at the bottom of the screen.

Summary

One of the interesting and useful features of wiki programs is that they will save every version of the pages, recording edits.

Users only see the most up-to-date information, but the wiki saves and records every change. (This is useful if the page is hacked, or your information is lost.)

A video game mantra is to “save early; save often,” and this applies to wikis. At this step, you want to save the boilerplate information by clicking “Save page.”  Then if you drop something on your keyboard, you can simply click on “Cancel” and any changes you made in the text box will be erased and your wiki page will revert to its last saved point.

EKwiki Part 2: Adding Photos and Images covers exactly what it sounds like. If you have photos and images uploaded and linked, you can go to EKwiki Part 3: Adding Personal Information.

Basic HTML Commands

HTML stands for Hyper Text Markup Language and can be used to enhance a book’s description. The building blocks of HTML are its tags. Tags are instructions for the web browser, such as Firefox or Chrome, that describe how text should be displayed.

Almost all tags come in pairs. This allows the coder to specify where an instruction begins, and where it ends. A tag is contained within brackets, like this:  < > . Anything typed within these brackets will not be displayed in the resulting HTML text.

The three most basic tags are for bold, italic, and underlined text. Here is what these tags look like when typed into the HTML box, with the results:HTML1

Note that each tag begins with a command in brackets, and ends with a command that contains a backslash. The backslash tells the HTML to stop applying that tag. When you are troubleshooting incorrect HTML, you will see most errors coming from unclosed tags.
HTML2

More than one tag can be used at once, which is referred to as ‘nesting’ tags. Here are some examples of nested tags:

HTML3

Bulleted lists require more complex tags: one to communicate that there will be a list, and one to describe each bullet. The <ul> tag begins and ends the list, and the <li> tag is used for every item.

HTML4
If the list needs to have a secondary or tertiary indent, simply nest <ul> tags.
HTML6
Some HTML input boxes will interpret carriage returns as a request for additional space. If the bulleted list requires sub-bullets, be sure to Preview the result before submitting it.
Finally, there are carriage returns. Many HTML input boxes will accept carriage returns as paragraph breaks. Adding the <p> tag errs on the side of caution and ensures a carriage return. The <p> tag is one of the few HTML tags that does not require an end command.

HTML8
All these tags can be combined.HTML9
When adding HTML tags to a block of text, it is most efficient to add the tags for bold, underlined or italic text first. Lists will sometimes contain tagged text, and it is easy to overlook the text within a list item, so lists should be tagged after text. Finally, paragraph tags should be added.